The Power of Alignment
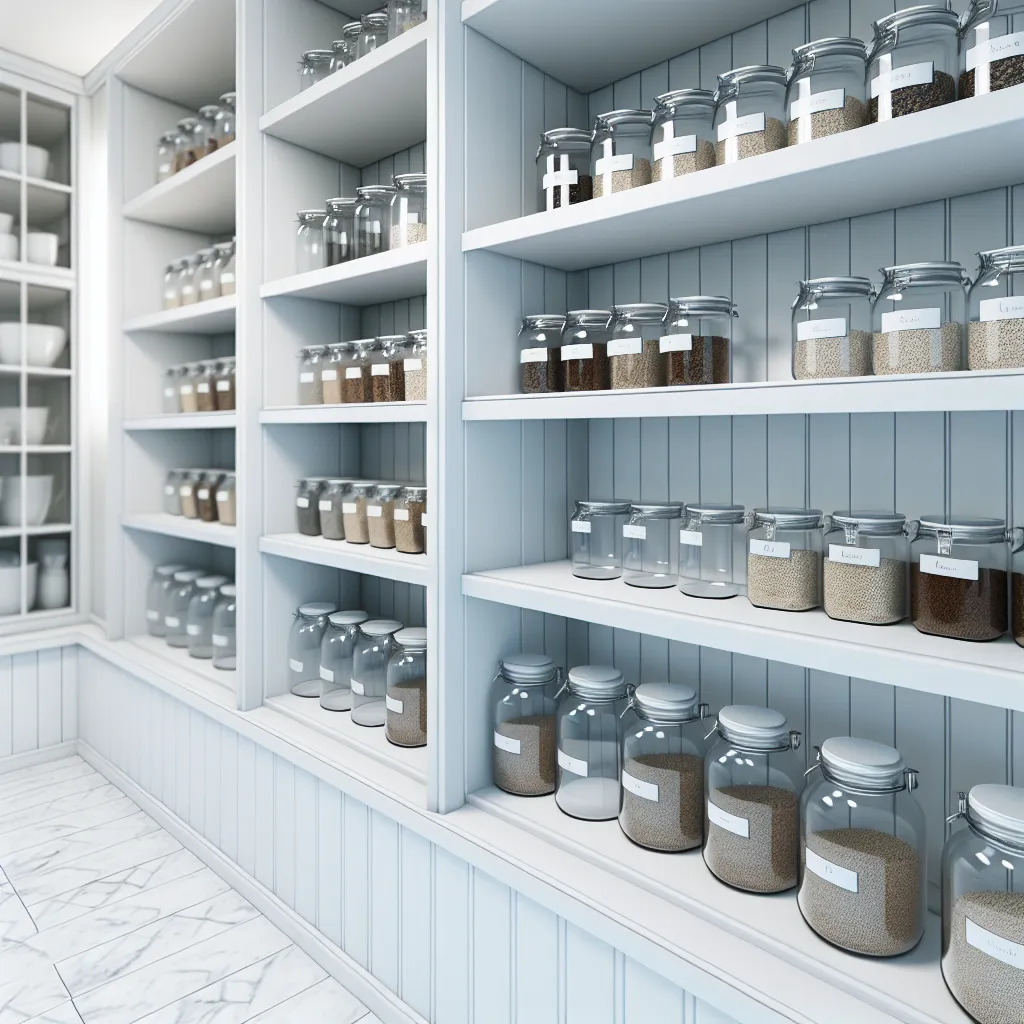
Perfect shelf alignment transforms a functional pantry into a beautiful, inspiring space. When jars are thoughtfully arranged by height, category, and visual weight, your pantry becomes a pleasure to use and behold.
Professional organizers understand that alignment isn't just about aesthetics—it's about creating intuitive systems that make finding ingredients effortless and maintain organization naturally.
Our shelf alignment program teaches you the principles used by professional designers to create magazine-worthy pantries that are also highly functional.
Core Alignment Principles
Height-Based Arrangement
Place tallest jars at the back, graduating to shortest at the front. This creates depth, ensures everything is visible, and maximizes vertical space usage.
Category Grouping
Group similar ingredients together—baking supplies in one zone, grains in another, spices clustered. This creates logical organization and speeds up meal prep.
Visual Weight Balance
Distribute visual weight evenly across shelves. Don't cluster all dark or colorful items in one area—spread them for balanced, pleasing composition.
Frequency-Based Placement
Position daily-use items at eye level for easy access. Reserve upper shelves for occasional items and lower shelves for bulk or heavy ingredients.
Uniform Spacing
Maintain consistent spacing between jars. Use shelf liners or markers to establish regular intervals that create rhythm and order.
Label Alignment
Position all labels at the same height and facing forward. This small detail creates tremendous visual cohesion and professional appearance.
Step-by-Step Alignment Process
Step 1: Empty and Assess
Remove all items from your pantry. Clean shelves thoroughly. Measure shelf dimensions and heights to understand your working space.
Step 2: Sort by Category
Group all jars by category (baking, grains, spices, etc.). This helps you visualize zones and decide which categories get which shelves.
Step 3: Plan Shelf Zones
Assign each shelf a primary category. Consider frequency of use—place daily items at eye level, occasional items higher or lower.
Step 4: Arrange by Height
Within each shelf, place tallest jars at back, shortest at front. This ensures everything remains visible and accessible.
Step 5: Fine-Tune and Balance
Step back and assess. Adjust spacing, redistribute colors, align labels. Small tweaks make huge visual differences.